Anna Shalomova
PPM Consultant
The change management process helps control the life cycle of strategic, tactical, and operational changes to projects and portfolios through standardized procedures. Change management aims to prevent risks and minimize disruption to business operations. Change management aims to establish standard procedures for managing change requests in an agile and efficient manner to reduce the risk and the impact a change can have on business operations. In other words, do you need to change the server configuration? Make a plan, approve, apply, and update the documentation. Do you need to implement a new process (project, portfolio, team)? Make a plan, approve, apply, and update the documentation. Do you need to transfer the database from one host to another? Well, you get the gist.
Navigating Change with Effective Change Management
While no practice or methodology can assure 100% success, change management can help manage risks and safeguard your entire PPM effort against unnecessary errors. Maintaining reliable business systems is essential for the success of any organization. Adjustments to any project and portfolio infrastructure element can disrupt a project’s value and negatively impact productivity. Structured and planned change helps minimize the potential risk of infrastructure changes; at the same time, a well-structured and intentional change management process comes with significant business benefits. Some of the benefits that result from change management include:
- Improved IT to business alignment
- Decreased adverse impact on business operations
- Improved visibility into change
- Prioritized responsiveness to change
- Adherence to government and other compliance regulations
- Improved risk management
- Reduced service disruptions and system downtime
- Increased staff productivity
- Faster change implementation
Change Management Essentials
Whatever the aesthetics of IT management may say, we sincerely believe you can use change management techniques in companies of any size. The bureaucracy occupying your precious time can be left to large corporations that can afford any costs to maintain stability. Small but proud teams can gradually introduce all the best in change management, not in one fell swoop. You can start with a tiny but beneficial document—the so-called “Change Plan”—describing how the change will occur. For example:
- Description. What will change (in a nutshell).
- Why it must be done. If you think about it, it may turn out that specific changes are not needed.
- Who will be involved in the change process.
- Links to documentation. It is desirable for the official but possible for other trusted sources. Documentation determines the correctness of your actions. In general, it is helpful to read.
Installation
- Pre-installation. All you need to do before the time for which the change is planned. The critical points of this section are Reconciliation and Backup. Reconciliation is a crucial point in the plan. All employees affected by the change should be warned, and those responsible should give their consent. A very simplistic example: from 10 to 11 on Monday, you are going to replace the printer, and at this time, the payroll sheets will be sent to print by the unsuspecting accounting department. Backup is the second critical stage of any change. Often in the backup settings, there are options: to make an incremental or differential backup. The difference is quite simple. With a differential backup, you can save space. But there are fewer possibilities for recovery. Incremental backup allows you to roll back to any of the moments in the past when the backup was done. However, especially if changes in data are frequent, you’ll need more extensive data storage.
- Install plan. All actions will be performed at the time of “X” in steps. In as much detail as possible: go to server “A” via SSH, execute commands: 1, 2, 3 … and so on.
- Post-installation. Check that the system and all other systems interacting with it work correctly; return all the settings made in preparation for the change; make changes to the documentation.
- Backout Plan. Actions that will be performed in case of problems within a reasonable time.
- Applications. If there is much reference information in the plan, you can collect it here—IP addresses, server names, paths in the file system, etc.
In addition to the apparent advantages of drawing up such plans, one nice bonus: you can make the changes over time according to the previously tested template. Despite its simplicity, this approach is not used in many organizations with few employees, even though it will stabilize the organization’s infrastructure.
Change Automation, Risk, and Scheduling
Begin your change management automation strategy with clear definitions of business rules for change risk assessment, scheduling, and approvals, and oversight. With change management automation, your organization can speed up changes’ deployment and reduce the risks associated with change. When you automate change risk assessments, you improve the efficiency of your change management process by expediting change request categorization. This way, you can expedite more standard, lower-risk changes.
Checklist for automating change risk assessment:
- Create and prioritize rules to determine risk.
- Define risk assessment categories, questions, weights, thresholds, and conditions.
- Review all assessment factors (business rules, requirements, weights, thresholds, etc.) with the change management.
- Create change scheduling
Change scheduling automation should provide the ability to detect and assess whether a planned change conflicts with other changes or blackout periods. You must also evaluate if the proposed change timing meets pre-defined maintenance windows. This requires administrators to specify times during which change requests should not be scheduled and the times during which change requests should be scheduled. You can run automated conflict detection at specific intervals or when a change request is updated.
Project Online Configuration Best Practices
Project Online is a cloud-based service that can offer Microsoft’s rich set of Project Portfolio Management (PPM) capabilities within the convenience of the Office 365 cloud infrastructure. Although one of the benefits of using a cloud-based service is avoiding having to deal with deployment, setup, hardware, and software tuning, it still requires adjustments to meet business requirements, project management processes, and methodology. Let’s talk about Customizing and Configuring the Project’s Online environments. Below are areas that can potentially impact the overall performance of your Project Web App site.
Synchronization Between Project Online and SharePoint
Permission modes, by default, come with SharePoint. When possible, keep the default SharePoint permission mode for better overall performance. If you must change it to Project permission mode, limit your customization as much as possible. To sync user permissions for your project site, you can configure this setting when the default mode is disabled. You should disable the permission sync option if:
- You have many resources (>1000)
- You have many projects that require a Project site (>1000)
- You have many resources that need to be granted access to the majority of the Project sites
- Project sites are created outside of the default site collection (sync is disabled)
Here are some options to consider for managing your Project site permissions:
- If your project teams have a low turnover, consider turning off Project site permission sync to improve Project Publish and Project Detail Pages performance. You would then have to manually grant or remove permission to your Project sites whenever someone joins or leaves a project team.
- If access needs to be granted for all users in PWA and it maps to your existing group permissions, consider configuring your Project sites to inherit from the parent PWA site.
- If site access aligns with specific roles, create one or more groups that map to those roles (possibly, if you have Group sync enabled, you can use the same groups) and grant those groups access to the Project site.
Project Site Configuration, PWA Compare, and Audit Documentation
Project Site creation is turned off by default. If your organization uses PWA, select the option to create them on-demand rather than automatically so that you can configure each. The first publishing experience is sped up by avoiding creating unnecessary content. To compare two previously-created PWAs, you can use a nifty tool called the “G.A. Suite Compare module.” It is designed so you can easily compare PWA configurations of two PWAs and generates a file (Excel) that contains the results of this comparison. It has a summary tab and a separate tab for each configuration entity that was compared (for example, Fields, Lookups, Views, etc.)
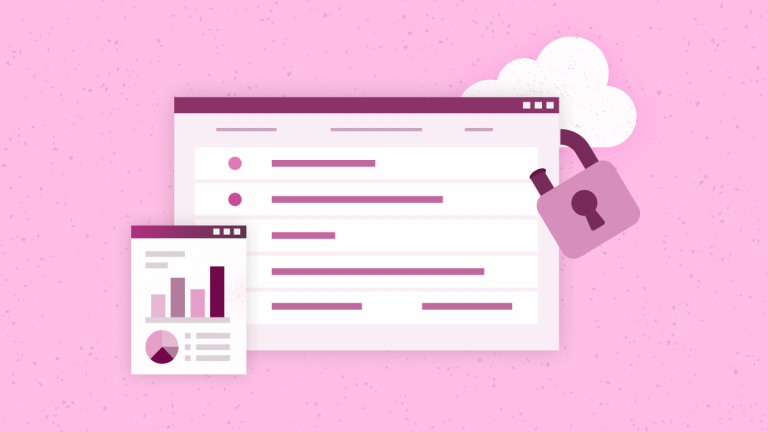
G.A. Suite also has a Document module. It allows users to create an Excel file that contains PWA configuration documentation with information about every configuration. A user may start the documentation process in two ways: the “Documentation menu” and the “Document” option for completed backups. You can use source-specific credentials if you want PWA credentials different from those specified in the PWA “Settings page.” You can set up the notification after the documentation is finished. When the tool ends generating the documentation of your PWA configuration, you will receive an Excel file with the configuration at the specified email address. In another way, your G.A. Suite will document the content of the PWA Configuration included in a backup copy. PWA Configuration must be included in the selected backup copy to document the configuration from a backup.
Backups
There’s great value in having backups done correctly, but the ability to save the configurations as you would do backups makes you practically invincible. FluentPro G.A. Suite allows users to use Documentation features and full Backup, including projects, content, and everything. More so, in both cases, you can automate this process.
G.A. Suite allows for backup of both general and specific project plans if there is such a need. You may filter the projects by the date of the last viewing modification and create a backup for particular periods. Later, you can quickly restore the data. While restoring data, you can also get back the whole set or select a specific “target.” Also, you can use particular credentials options to specify credentials that G.A. Suite will use to restore the data to PWA. The content section lets you choose which content to convert to the PWA—PWA Configuration, Projects, Sites…
G.A. Suite also has an “On-Demand Backup” that allows you to perform the on-demand manual backup of your PWA data. Project Online data is divided into four sections:
- PWA Configuration – can be fully or partially backed up;
- Project Plans;
- SharePoint Sites;
Using the Backup Profile, settings, you can specify a backup schedule, such as Daily, Weekly, and Monthly, as well as content to backup, and the G.A. Suite service will automatically create a backup according to these settings.
View Customization
Organizations can create custom views using multiple Project Web App pages, including Project Center, Resource Center, Tasks, and Timesheets. The more content is displayed, the slower page rendering will be. You can reduce each page load time by a few seconds if you provide users with a more significant number of targeted and pertinent views rather than a few “all-in-one” views. When you configure views, offer users simple specialized views for faster navigation rather than an overly complex, all-in-one view that would load unnecessary data most of the time.
User View Settings
- Group by Rollups (Unless a user needs to see the rolled-up values, disable the Rollup option in the ribbon)
- Gantt Chart (Unless users need to see the Gantt chart, disable the Gantt Chart option in the ribbon)
The Project Detail Pages allow users to create lightweight, specialized PDPs and avoid mixing schedule-related and non-schedule-related updates. Project Online has two main update processes for project information:
- Updates requiring a scheduling recalculation (In Project Online, you can also create a Project calendar, and by default, you can change the following data fields: start date, finish date, status date. current date.)
- Non-schedule-related fields, such as project name, description, and owner. (We recommend you avoid updating both data types on the same PDP to prevent triggering both update processes simultaneously.)
Common Actions Requiring Schedule Recalculation
Here is a list of the most common actions requiring schedule recalculation. Another way to improve PDP performance is to reduce the number of web parts and custom fields displayed on each PDP. If your business processes require frequent updates to the same fields, create a dedicated PDP with only these fields to improve the load and save time. If your work process requires a bulk edit of custom fields, you should focus on FluentBooks. This is a comprehensive PPM toolbox that, among other things, you can use for bulk editing. It allows you to summarize all portfolios, projects, or resources for a quick edit.
By default, the list on a Bulk edit page shows only the fields with the default attributes. To display additional attributes, open the Configure menu and mark the columns you want available for viewing and editing. The Configure columns menu includes not only the attributes available by default but also custom project, portfolio, or resource custom fields created by users. To edit any item, you double-click it. There’s also an option to bulk edit Custom Fields in a PWA. One way is to edit all the Custom Fields manually, but this operation can be quite time-consuming and requires a lot of attention. Another way is to use FluentBooks, which can assist a user with bulk edit and thus save you time.
Efficient Bulk Editing with FluentBooks
To do so, you can follow the next steps:
- The first step is downloading custom fields from the PWA into the FluentBooks workspace. Run FluentBooks, select “Import” from the “File” menu, and then “Download PWA Configuration.”
- Specify the PWA URL and login credentials, and click “Next” to proceed.
- Select entities to download. After selecting all the necessary entities, click “Next.”
- Turn on the necessary download settings by checking their radio boxes.
- Allow the wizard some time to download the PWA configuration. The Log option allows viewing the log records in real time during the download process. Click “Close” after completing the download. There’s a nice bonus of enabling you to save imported data to a file (it will be a FluentBooks Workspace file – *.fbwx2). Click “Yes” to save the data and proceed or “No” to proceed without saving imported data on file.
- “Download Summary” shows the import results. You can review it from the screen and export to Excel.
- Finally, click “Finish” to close the wizard.
Downloading Custom Fields with FluentBooks
You can now download all Custom Fields from the PWA into the FluentBooks workspace. The next step is to export custom fields from the FluentBooks workspace into an Excel file, where you can edit these entities. FluentBooks Workspace displays all the Custom Fields downloaded from the PWA. You can select the exact fields for export. You can export only elements with the checked radio box into the Excel file. Besides clicking the packages manually, you can also use the following tools to speed up the selection process:
- All the elements will get checked/unchecked if you click the radio box in the column header;
- Clicking the column header will allow you to sort each of the columns; this will be helpful if, for example, all fields of one type or entity type need to be transferred;
- A range of elements will be selected if you hold down “shift” and press the “page up/page down” keys or hold “shift” and click the element by mouse;
- When several elements are selected, they can be checked or unchecked by pressing the space bar on the keyboard;
- The “invert selection” link at the bottom of the window will check all the unchecked elements and uncheck all the checked elements.
Exporting and Editing with FluentBooks
After selecting all the necessary Custom Fields, they can be exported into an Excel file using “Export Workspace data to Excel.”
- Select the “Export” option from the File menu and then “Export Workspace data to Excel.”
- Specify the Excel file to which Workspace export data, ensuring that the “Custom Fields” radio boxes are checked. Click “Export” to start the export process. Allow the wizard some time to export the custom fields. The Log option lets you view the log records in real-time during export.
- Click “Close” after the export is completed. An Excel file with the exported Custom Fields will be opened automatically. Excel tools can be used to edit Custom Fields as needed. After editing, the exported data will be imported back into the Workspace, and FluentBooks will update the existing elements and add any new elements.
Schedule a free consultation
to get help with configuration change management