Anna Shalomova
PPM Consultant
We all face situations when we need to “quickly collect” data from some apps and export it into others. Or when there are multiple disconnected places where the data is stored, and the company needs to synchronize it across these storages. All these repetitive operations can be replaced with a “global macro,” which can be implemented using Microsoft Power Automate. This service is a part of Microsoft Power Platform, and its job is to automate daily work and enhance analytics.
What Can Microsoft Power Automate Do?
Microsoft Power Automate is an online service that transforms repetitive user actions into automated workflows — receiving notifications, file synchronization, data collection, and more.
In simple terms, Power Automate can do, for example, such things:
- It makes working with email easier and keeps track of statistics by email;
- You can select messages from email and record statistics about them in Google or Excel spreadsheets;
- Forward Gmail messages matching a specific condition;
- Save email attachments to Google Drive, OneDrive, or Dropbox;
- Sync data to the cloud, send notifications, and keep records in files;
- OneDrive, Google Drive, and Dropbox file sync;
- Send notifications when upgrading SharePoint or cloud files and folders;
- Record form responses in Google spreadsheets.
- Social Media Publications:
- Post Instagram photos to Facebook and post these photos to Pinterest.
- Send tweets with the specified keywords via email.
- Save comments for Instagram posts to Google spreadsheets.
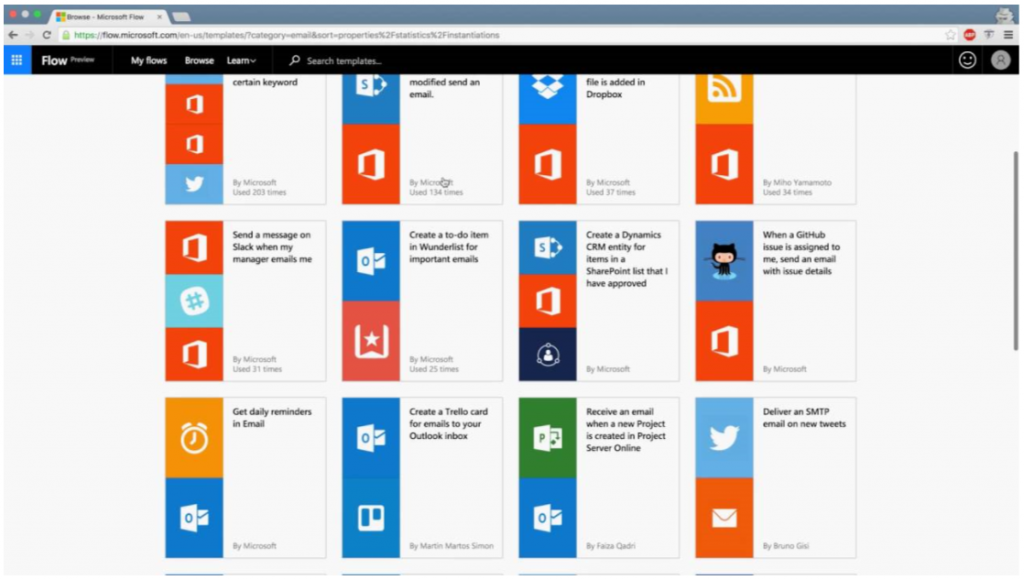
And many more. Cool? It may seem complicated and unfamiliar. But do not worry, the Power Automate website offers dozens of customized templates for process automation – the list is quite large.
Choose Templates or Create Your Own
Power BI analysts can “connect” and analyze data from the sources that were previously unavailable, as well as increase the number of ways to notify users.
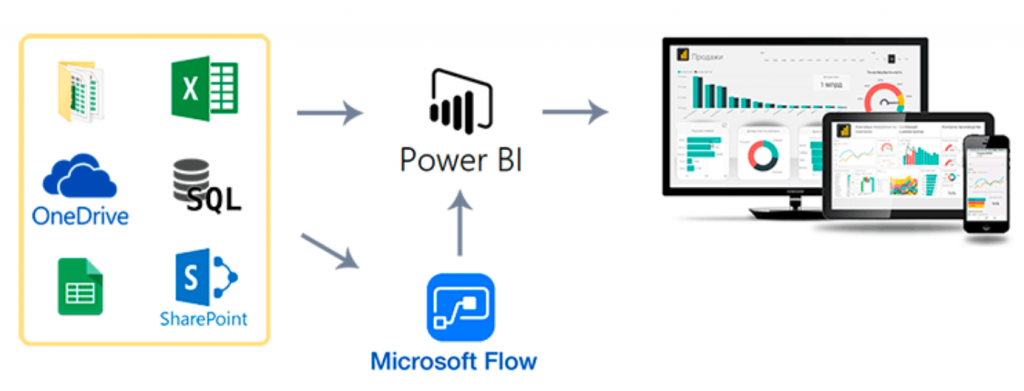
Which Applications Does Power Automate Work With?
Power Automate can connect to over 280 applications. First of all, these are Microsoft products – Excel, Outlook, Power BI. It also supports Google spreadsheets and other Google services, the OneDrive cloud, Google Drive, Dropbox, as well as Skype for Business, SharePoint, Dynamics CRM, SQL Server, Azure, Oracle, Project Online, WordPress, RSS. There are connectors for social networks, such as Facebook, Twitter, Instagram, YouTube, Pinterest, Outlook email services, Gmail, email marketing services, such as MailChimp, and so on.

Understanding Microsoft Power Automate
Working with Power Automate, the user creates sequences which are called Power Automates each of them consists of:
- trigger – an event that triggers the stream of actions (for example, receiving a letter);
- and actions to be taken.
Power Automate is available either online or in a mobile application that you can download from the application store. Links for the browser:
- on the MS Power Automate website – click “Sign in” and proceed with your Microsoft account;
- or on the Office portal – log in and select Power Automate in the list of applications.
Creating Automated Processes with Power Automate
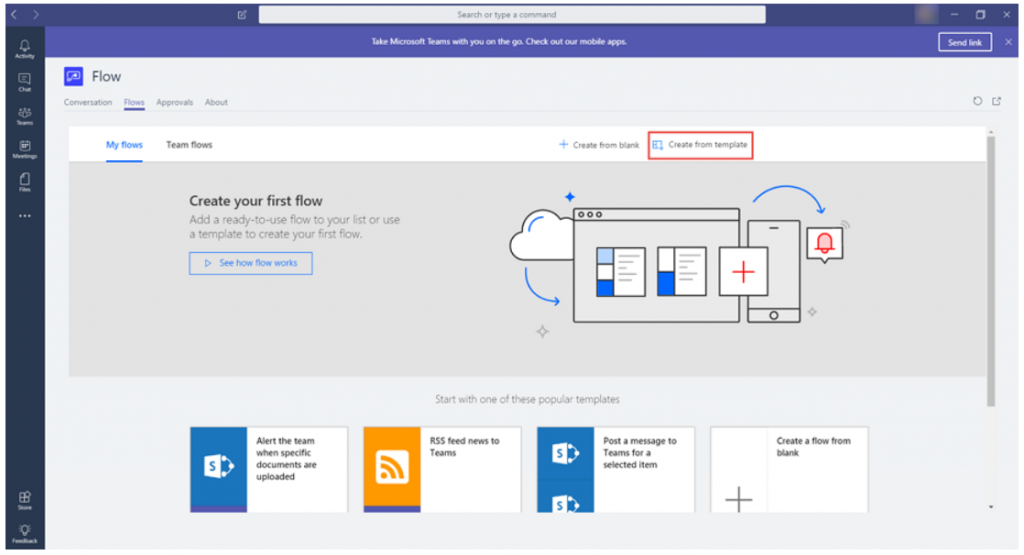
Let’s take a look at the example of how Power Automate works. We can start with a simpler option – a ready-made template. For example, we can create an automation that would record a list of emails received in Gmail to an Excel spreadsheet.
Open Power Automate and go to the Templates menu. Scroll down and find the template you need. Or to speed it up, type-in “Gmail excel” in the search bar. The search will return possible options. In our case, there are two of them. Select the appropriate one, for example, writing to an Excel Online for Business spreadsheet.
Configuring Templates and Stream Sequences
After you select a template, a window with instructions will appear. Go through all the steps: Enter your email (you will need to enter it). A green checkmark will appear next to the mail icon if everything is entered correctly. If Excel is involved, then communication requires markers or labels – in which table what to write. The wizard will tell you precisely what you need to create. Create a table in Excel Online with the Subject, From, Date, and Snippet columns as required. Format it as an intelligent table: Home → Format as a table.
Customizing Power Automate Streams
Make changes to the configured stream – in the created stream, we will redirect letters from the specified senders (for example, clients or partners) to the colleague’s mail. And at the same time, let’s see how to work with conditions in Power Automate. In the query you created, click the arrow under the first step and select Add Parallel Branch.
For a new step, select the Condition control. Pay attention – when creating a new step in the menu, select actions or triggers. Set a condition – specify the sender of the email. Fill in the data to redirect the email to a colleague and save the stream. Try it – it is pretty simple and does not require special knowledge and skills. And most importantly, everything is already configured in the templates.
You could create a stream from scratch if you did not find a suitable template. And use different types of sequences – automated, button sequence, planned, or business process. The creation process for custom sequences is pretty much the same as the template-based ones.
Schedule a free consultation
to get help with Power Automate today